
The EZMealApp Applications utility allows you to quickly process the Applications submitted through EZMealApp with the Patrons in your school. The EZMealApp Applications utility screen appears as shown below:
If you have not already done so, you will need to click Sync Applications first. This will import all of the EZMealApp Applications that have been submitted since the last time you clicked Sync Applications, making them available for processing.
Once you have synced the applications with eTrition 7, you can search for applications for processing or review using the search form provided. Use the From and To fields to select a date range from which to draw applications, or enter a Confirmation Number to display a specific application. You can also search by a specific Application Status, such as New, Processed or Invalid, or select All to display all applications within the date range you specified.
Click Search to generate a list of applications that match the information you provided, as shown below:
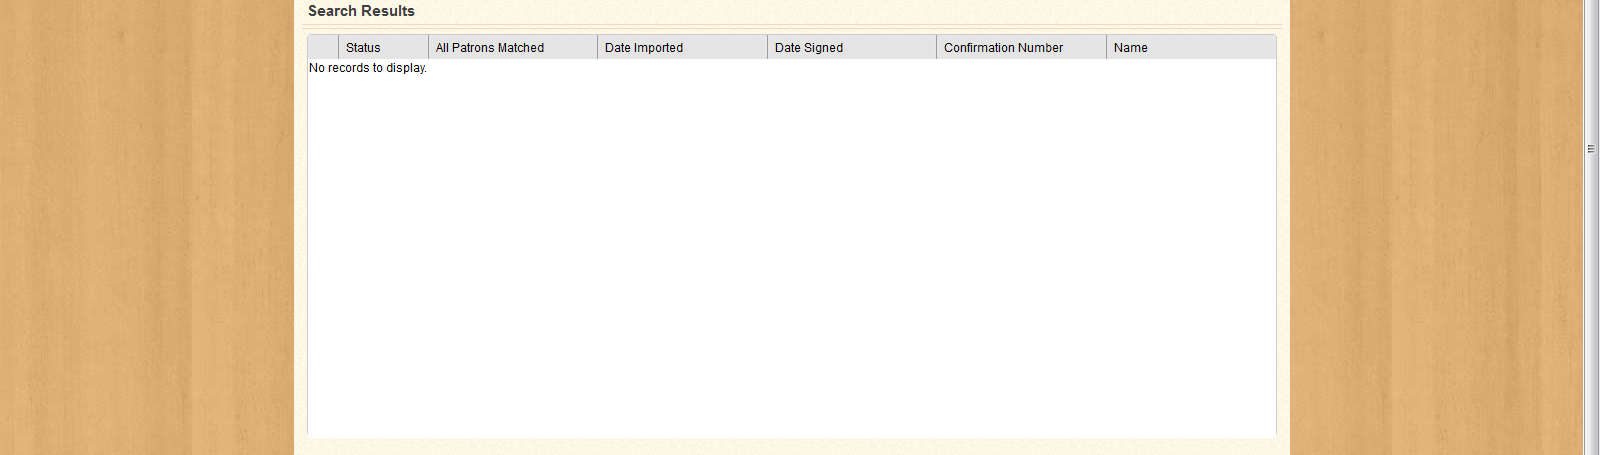
You can sort the list of applications by Status, Date Imported, Date Signed, Confirmation Number, Name, or whether or not all of the patrons on the application have been matched to their corresponding information in eTrition 7 by clicking the column headers. Click the  icon in the first column of each row to view the application listed in that row.
Clicking the Edit icon opens the Application screen, as shown below:
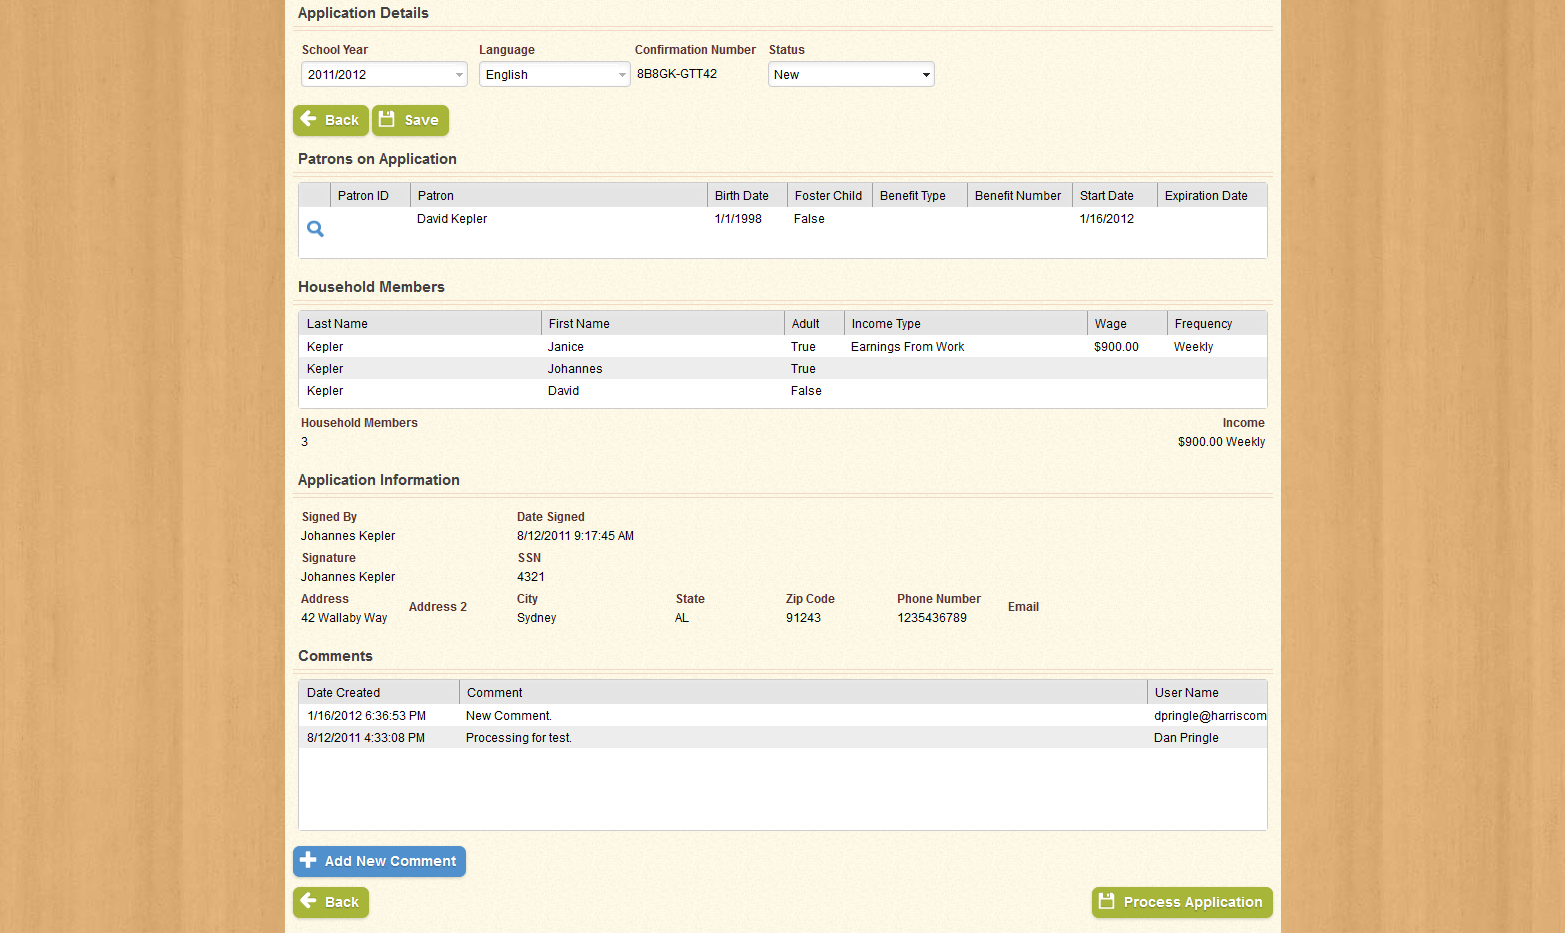
Review the application as needed. If one or more patrons on the application already have information entered into the Patron Information screen, use the  icon in the Patrons on Application section to open the Select Patron window, which will allow you to match patrons directly to the appropriate Patron ID. Note that you must create a Patron Information screen and a Patron ID for each patron, and match the patron to the Patron ID on this screen, before you can process the application.
If you cannot process the application yet, you can click the Back button to return to the previous screen.
The window will appear as shown below:
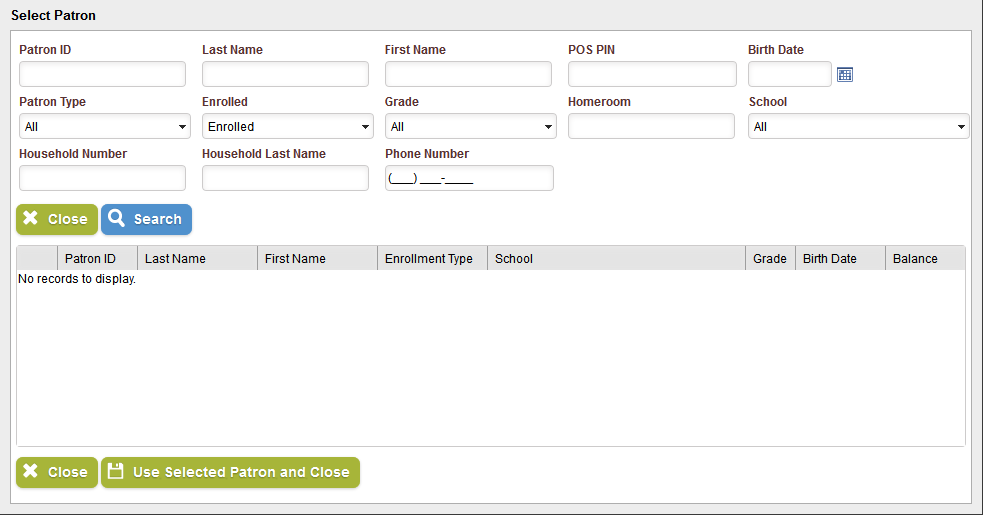
Use the fields and drop-down menus provided to search for a specific Patron, and click Search to generate a list of patrons that match the information you provided, as shown below:
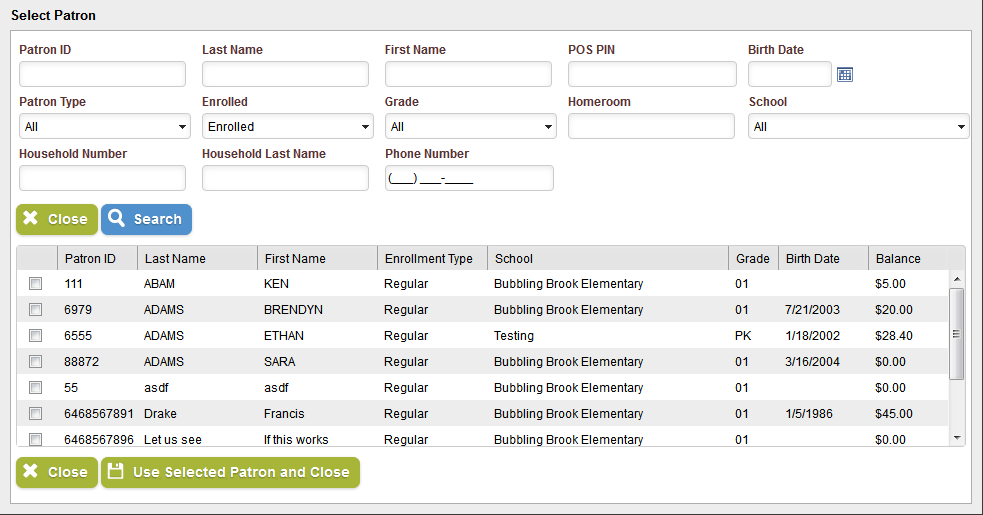
If you do not see the patron you were looking for, you may need to refine your search criteria, or you may need to create a Patron Information entry for the patron. Otherwise, use the check-box in the first column of the row where the appropriate patron is listed, and click Use Selected Patron to add the Patron ID to the application. Click Close to close the window without selecting a patron.
Once you have reviewed the application and matched the patrons on the application with existing patrons, click Process Application to import the application into the Patron Applications screen.
| Field Name | Description |
|---|---|
| Patron ID | Displays the selected patron's ID number. |
| Last Name | Displays the selected patron's last name. |
| First Name | Displays the selected patron's first name. |
| POS PIN | Displays the selected patron's POS PIN. |
| Birth Date | Displays the selected patron's date of birth. |
| Patron Type | Displays the selected patron's Patron Type, such as Student or Adult. |
| Enrolled | Designates whether the selected patron is enrolled, not enrolled, enrolled with a future date, or whether all enrollments will be displayed. |
| Grade | Displays the selected patron's current grade level. |
| Homeroom | Displays the selected patron's current homeroom. |
| School | Displays the school at which the selected patron is currently enrolled. |
| Household Number | Displays the ID number of the selected patron's household. |
| Household Last Name | Displays the last name of the selected patron's household. |
| Phone Number | Displays the selected patron's Household Phone Number. |
You may want to include one or more comments on the application, which will be added to the Patron Application screen after processing. The Comments section appears as shown below:

Click Add New Comment to open the Add New Comment window, as shown below:
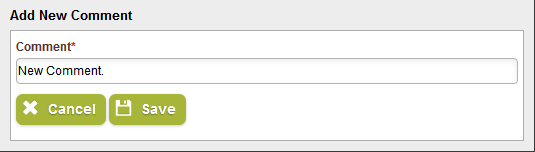
Enter the comment in the field provided, and click Save to add the comment to the application; click Cancel to close the window without saving. Note that once you have added a comment to an application, it cannot be removed. The Comment will appear as shown below:

| Important! | Fields marked with * are required; you will not be able to continue until all required fields have been filled. |
| Field Name | Description |
|---|---|
| Comment | Displays the comment that will be added to the application. |
| Date Created | Displays the date on which the comment was created. |
| User Name | Displays the user name of the user that created the selected comment. |
Once you have reviewed the application and matched the patrons on the application with existing patrons and made any desired Comments, click Process Application to process the application and add it to the Patron Application screen. The screen will change as shown below:
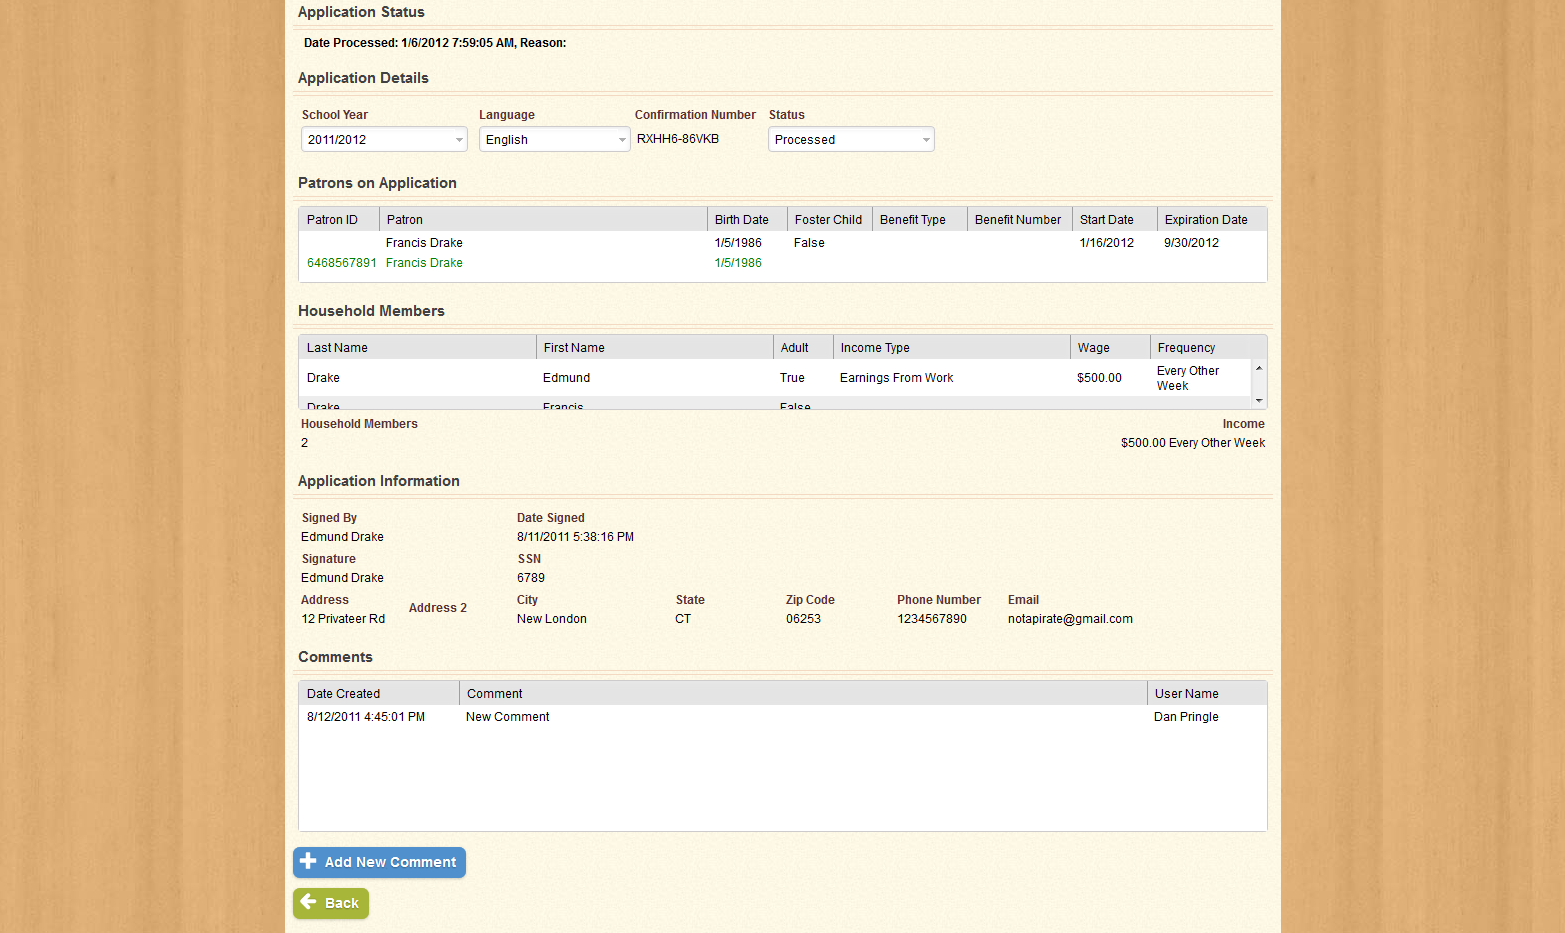
Note that you can still add comments to the application, but every other field has been disabled. You can make additional changes to the application within the Patron Applications screen.