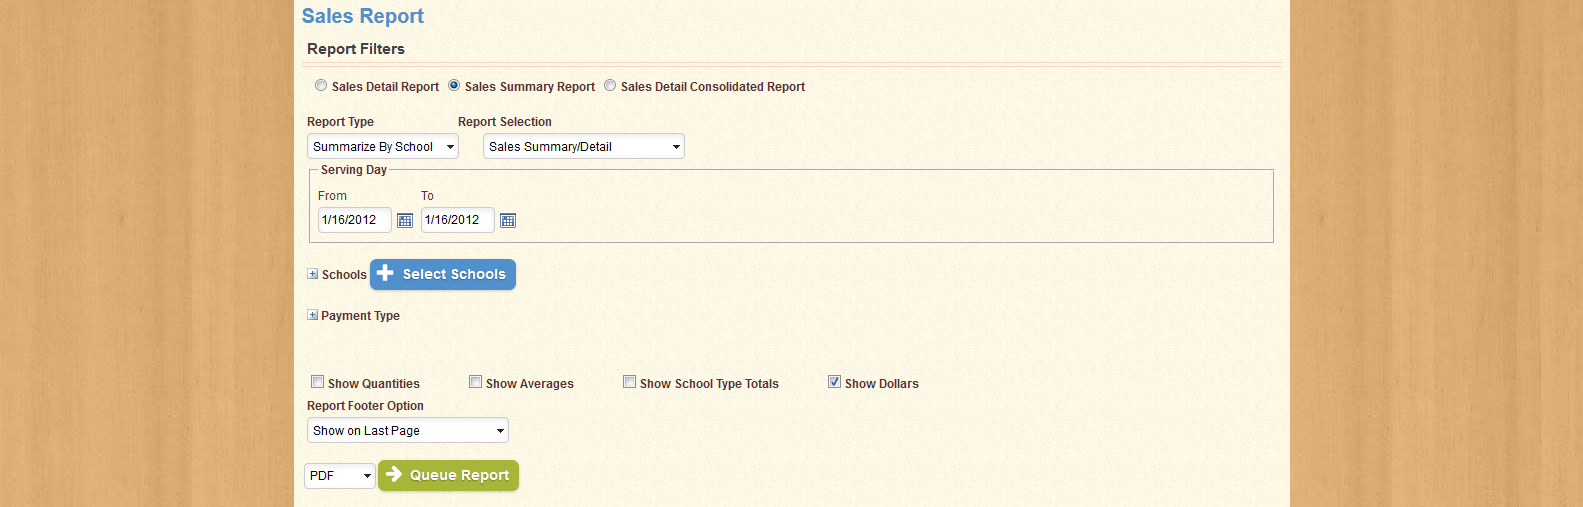
Use the Sales Report to collect and display information relating to sales at a specific school, or throughout your district. You can display information for each sales item, specific meal sessions, or specific school types. The Sales Report screen appears as shown below:
Use the drop-down menus to set the options for the report, as described in the following sections. When you have set the desired parameters for the report, use the buttons at the bottom of the screen to run the report as either a .csv, .xls, or .pdf file.
| Important! | Fields marked with * are required; you will not be able to continue until all required fields have been filled. |
| Field Name | Description |
|---|---|
| Report | Select which report you wish to run. Selecting a new Report will change the configuration of this screen. |
| Report Type | Select a data parameter for the selected Report. |
| Report Selection | Select a Report Template for the selected Report. This will determine which columns will appear on the report, and in what order they appear. |
| Date Range | Select a start and end date for the selected Report. Data will be collected from each date between the start date and end date provided. |
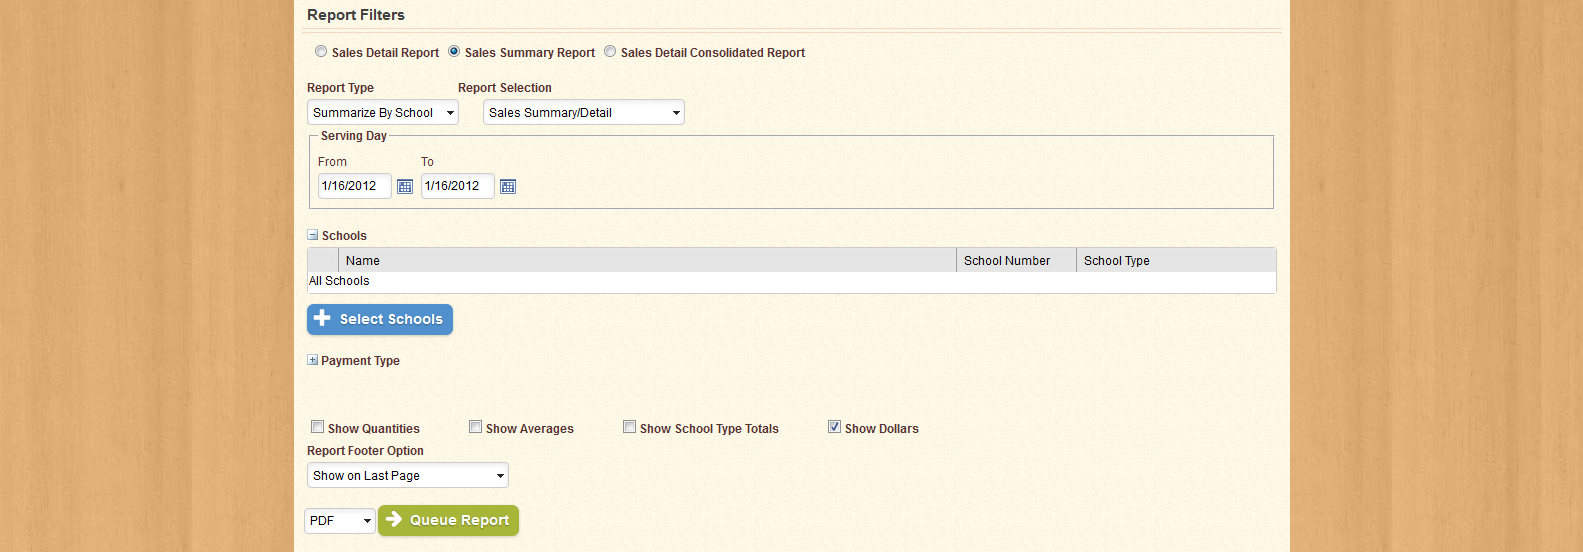
The Sales Summary Report displays the total sales for your district. When you select Sales Summary Report from the Report drop-down menu, the section appears as shown below:

Use the Report Type drop-down menu to select whether information will be displayed by School or by Date. Use the Report Selection drop-down menu to select the Report Template that will be used to generate data for the report.
Use the Date Range fields to select the start and end date for the report, select any additional options using the check-boxes provided, and then run the report using one of the three buttons at the bottom of the screen.
| Important! | Fields marked with * are required; you will not be able to continue until all required fields have been filled. |
| Field Name | Description |
|---|---|
| Show Sales Dollars? | If this option is selected, the dollar amount for each item will be displayed as a separate row for the school. |
| Show Sales Quantities? | If this option is selected, the quantity value for each item will be displayed as a separate row for the school. |
| Show Average? | If this option is selected, an additional row will be added for each School that displays the average dollar or quantity value (depending on which option is selected; if both options are selected, a row will be generated for each) per serving day, based on the number of serving days within the date range where a transaction took place. |
| Show School Type Total? | If this option is selected, the Schools will be separated by School Type, with a row detailing the total for each column by School Type. |
If you wish to select one or more specific schools for the report, click Choose. The section will expand as shown below:
You can use the Select All? check-box to use all active Schools on the report, or leave the check-box unselected to search for one or more specific Schools. Use the fields provided to narrow your search by School Name and Number, School Type, and School Group. You can also use the check-box provided to include inactive Schools in the results. When you have entered the desired information, click Search to generate a list of Schools that match the information you provided, as shown below:
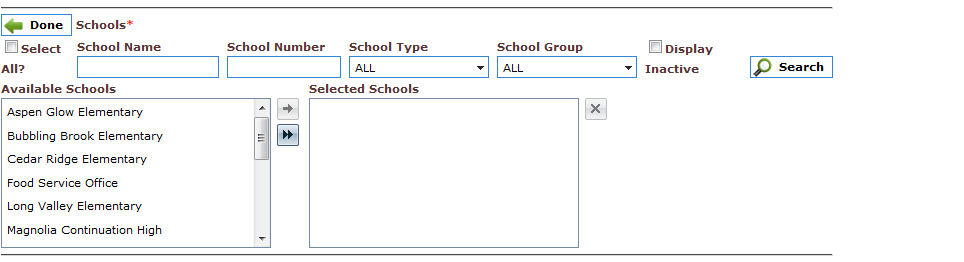
A list of available schools is displayed in the field to the left; use the arrow icon provided to add selected items to the field to the right, or use the double-arrow icon to add all available schools into the field to the right. You can select more than one item at a time by holding down the Ctrl key on your keyboard when you click each item.
You can remove schools from the field to the right by clicking the X icon provided.
When you have added the desired Schools to the field to the right, click Done to collapse this section. The number of items selected will be displayed beside the section label in parentheses.
| Important! | Fields marked with * are required; you will not be able to continue until all required fields have been filled. |
| Field Name | Description |
|---|---|
| Select All? | If this option is selected, the report will generate data for all active Schools. |
| School Name | Displays the name of the selected School. |
| School Number | Displays the identification number of the selected School. |
| School Type | Selects the School Type to which the desired School(s) belong, such as "Elementary School". |
| School Group | Selects the School Group to which the desired School(s) belong. |
| Display Inactive | If this option is selected, Inactive Schools will be displayed as well as Active ones when the search results are generated. |
| Available Schools | Displays a list of the schools that match the search criteria. |
| Selected Schools | Displays a list of the schools that have been selected for the current report. |
If you wish to select one or more Payment Types to be used to generate data for the report, clicking Choose next to Payment Type expands that section, as shown below:

By default, all Payment Types will be in the field to the right, meaning that they will be used when generating data for the report. To remove items from the list, use the arrow icons provided to move selected items from one field to the other; or use the double-arrow icons to move all items in one field to the other. You can select more than one item at a time by holding down the Ctrl key on your keyboard when you click each item.
When you have chosen the desired Payment Types, click Done to collapse this section. The number of items selected will be displayed beside the section label in parentheses.
The Sales Summary Report can be run by Date or by School, and displays Sales information for each Session within the selected Date Range by School. At the end of the report, a Grand Total for the District is also displayed. The following table lists each column used in the report, as well as a brief description of each column's function:
| Column | Description |
|---|---|
| Paid Breakfast | Displays the total Sales for the selected date or School for all meals served during the Breakfast Session. This column displays values for all Student Patrons with Paid Eligibility. |
| Reduced Breakfast | Displays the total Sales for the selected date or School for all meals served during the Breakfast Session. This column displays values for all Student Patrons with Reduced Eligibility. |
| Free Breakfast | Displays the total Sales for the selected date or School for all meals served during the Breakfast Session. This column displays values for all Student Patrons with Free Eligibility. |
| Adult Breakfast | Displays the total Sales for the selected date or School for all meals served during the Breakfast Session. This column displays values for all Adult Patrons. |
| Total Breakfast | Displays the total Sales for the selected date or School for all meals served during the Breakfast Session. This column displays values for all Patrons. |
| Paid Lunch | Displays the total Sales for the selected date or School for all meals served during the Lunch Session. This column displays values for all Student Patrons with Paid Eligibility. |
| Reduced Lunch | Displays the total Sales for the selected date or School for all meals served during the Lunch Session. This column displays values for all Student Patrons with Reduced Eligibility. |
| Free Lunch | Displays the total Sales for the selected date or School for all meals served during the Lunch Session. This column displays values for all Student Patrons with Free Eligibility. |
| Adult Lunch | Displays the total Sales for the selected date or School for all meals served during the Lunch Session. This column displays values for all Adult Patrons. |
| Total Lunch | Displays the total Sales for the selected date or School for all meals served during the Lunch Session. This column displays values for all Patrons. |
| Prepay Sold | Displays the total Sales for the selected date or School for all transactions with a Payment Type of "Prepay". |
| Student A La Carte | Displays the total Sales for the selected date or School for all A La Carte items sold to Student Patrons. |
| Adult A La Carte | Displays the total Sales for the selected date or School for all A La Carte items sold to Adult Patrons. |
| Total A La Carte | Displays the total Sales for the selected date or School for all A La Carte items sold to all Patrons. |
| Total | Displays the total Sales for the selected date or School. |
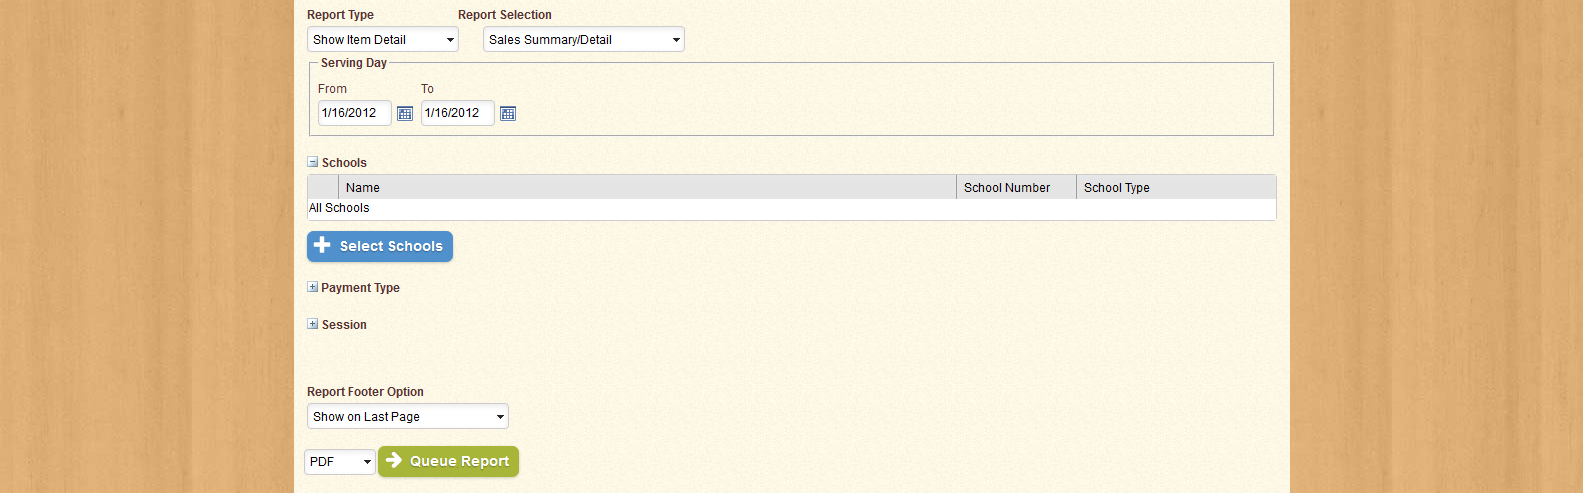
The Sales Detail Report displays detailed sales information for each School. When you select Sales Detail Report from the drop-down menu, the screen appears as shown below:
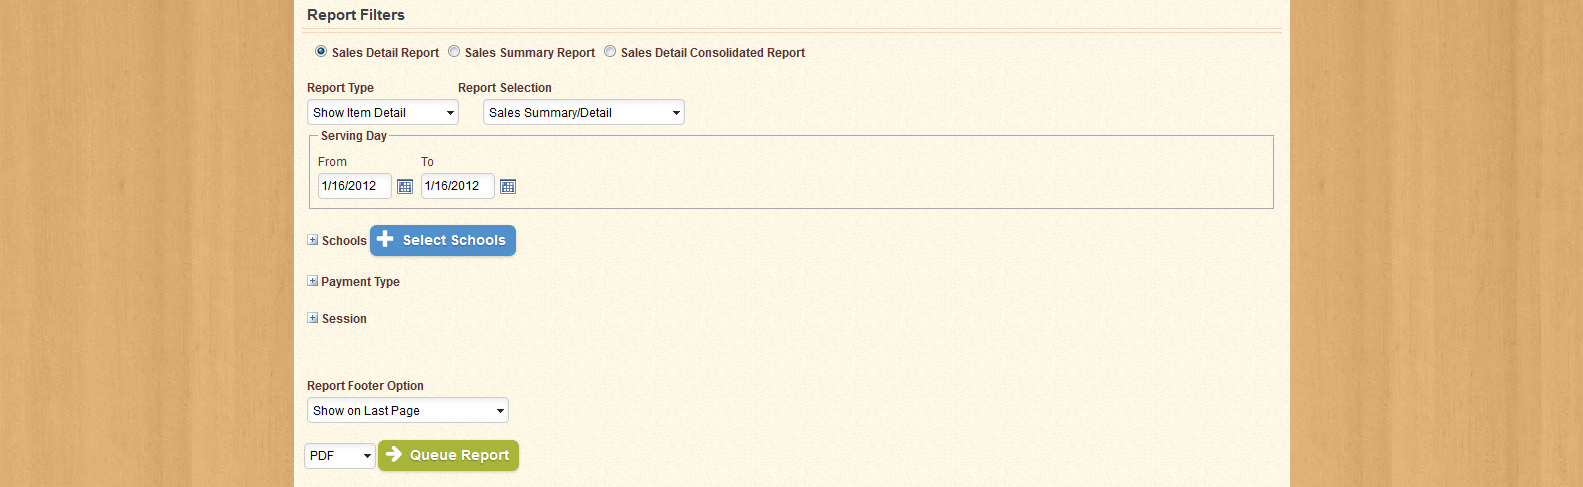
From the Report Type drop-down menu, select whether the report will display sales information for each Sales Item, or if the report will summarize the sales for each School. Regardless of the option you select, the data on the report will be separated by School, with each School's information being displayed on a separate page.
Select Schools, Payment Types, and Sessions as desired, enter a Date Range, and click one of the buttons at the bottom of the screen to run the report as either a CSV, Excel Spreadsheet, or PDF file.
| Important! | Fields marked with * are required; you will not be able to continue until all required fields have been filled. |
If you wish to select one or more specific schools for the report, click Choose. The section will expand as shown below:
You can use the Select All? check-box to use all active Schools on the report, or leave the check-box unselected to search for one or more specific Schools. Use the fields provided to narrow your search by School Name and Number, School Type, and School Group. You can also use the check-box provided to include inactive Schools in the results. When you have entered the desired information, click Search to generate a list of Schools that match the information you provided, as shown below:
A list of available schools is displayed in the field to the left; use the arrow icon provided to add selected items to the field to the right, or use the double-arrow icon to add all available schools into the field to the right. You can select more than one item at a time by holding down the Ctrl key on your keyboard when you click each item.
You can remove schools from the field to the right by clicking the X icon provided.
When you have added the desired Schools to the field to the right, click Done to collapse this section. The number of items selected will be displayed beside the section label in parentheses.
| Important! | Fields marked with * are required; you will not be able to continue until all required fields have been filled. |
| Field Name | Description |
|---|---|
| Field Name | Description |
| Select All? | If this option is selected, the report will generate data for all active Schools. |
| School Name | Displays the name of the selected School. |
| School Number | Displays the identification number of the selected School. |
| School Type | Selects the School Type to which the desired School(s) belong, such as "Elementary School". |
| School Group | Selects the School Group to which the desired School(s) belong. |
| Display Inactive | If this option is selected, Inactive Schools will be displayed as well as Active ones when the search results are generated. |
| Available Schools | Displays a list of the schools that match the search criteria. |
If you wish to select one or more Payment Types to be used to generate data for the report, clicking Choose next to Payment Type expands that section, as shown below:
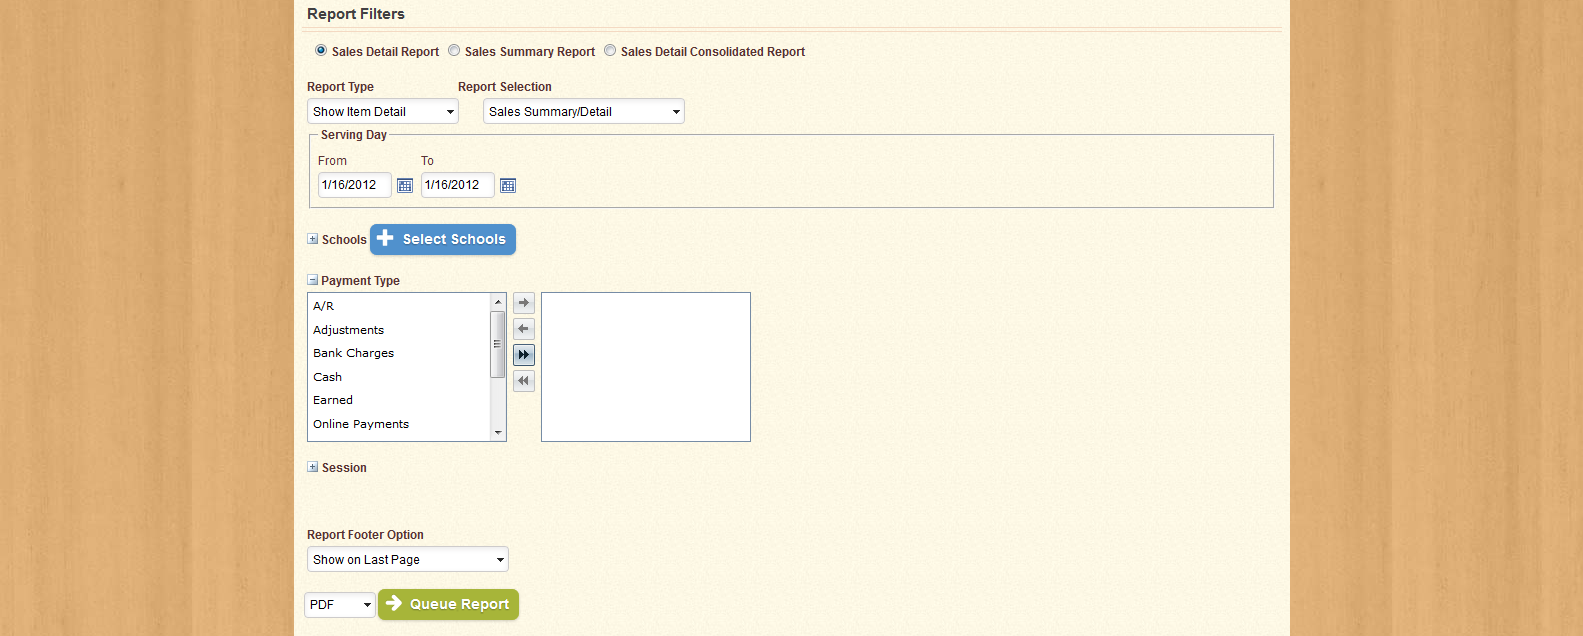
By default, all Payment Types will be in the field to the right, meaning that they will be used when generating data for the report. To remove items from the list, use the arrow icons provided to move selected items from one field to the other; or use the double-arrow icons to move all items in one field to the other. You can select more than one item at a time by holding down the Ctrl key on your keyboard when you click each item.
When you have chosen the desired Payment Types, click Done to collapse this section. The number of items selected will be displayed beside the section label in parentheses.
If you only wish to display sales information for a specific meal session, you can select those sessions by clicking the Choose button next to Session. The section will expand as shown below:
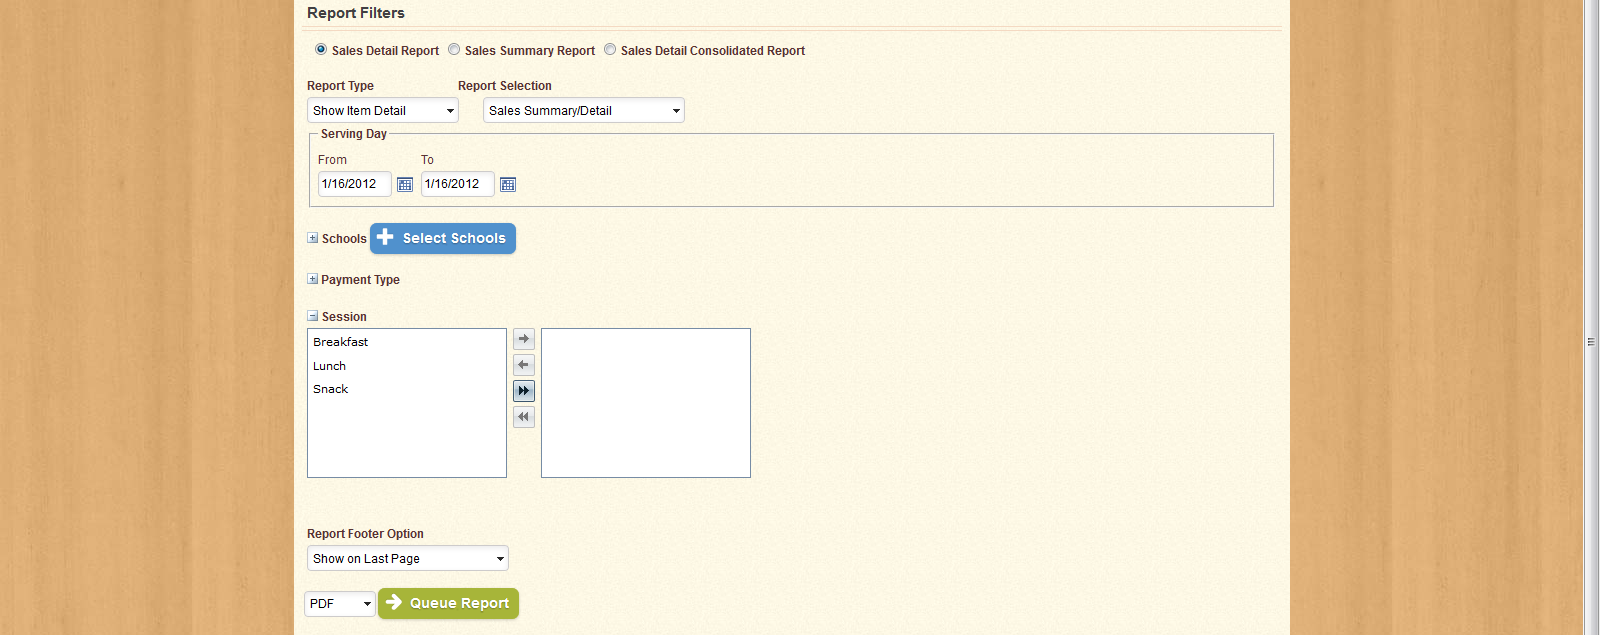
By default, all sessions will be selected for use on the report. Use the arrow icons provided to move selected sessions from one field to the other, or use the double-arrow icons to move all sessions in one field to the other. You can select more than one session at a time by holding down the Ctrl key on your keyboard when you click each item.
When you have selected the desired sessions for the report, click Done to collapse this section. The number of sessions selected will be displayed beside the section label in parentheses.
The Sales Detail Report can be run by Item, or Summarized by School, and displays sales information for each item within the selected date range by Session. The following table lists the columns used in the report, as well as a brief description of each column's function:
| Column | Description |
|---|---|
| Session | Displays the Session during which the selected Item was sold. |
| Item Description | Displays the name of the Sales Item that was served or sold. |
| Pay Type | Displays the Payment Type for the selected Item. |
| Patron Type | Displays the Patron Type (Student, Adult) to which the item was served. |
| Quantity | Displays the number of the selected Item sold to the selected Patron Type with the selected Payment Type. |
| Rate | Displays the Rate, in dollars, per item as sold to the selected Patron Type with the selected Payment Type. |
| Revenue | Displays the total Revenue received for the selected item sold to the selected Patron Type with the selected Payment Type. |
Note that if the report is Summarized by School, only the Quantity and Revenue columns will be displayed.
The Sales Detail Consolidated report displays the same information generated by the Sales Detail Report, except that the information is not separated by School. When you select Sales Detail Consolidated from the drop-down menu, the screen appears as shown below:
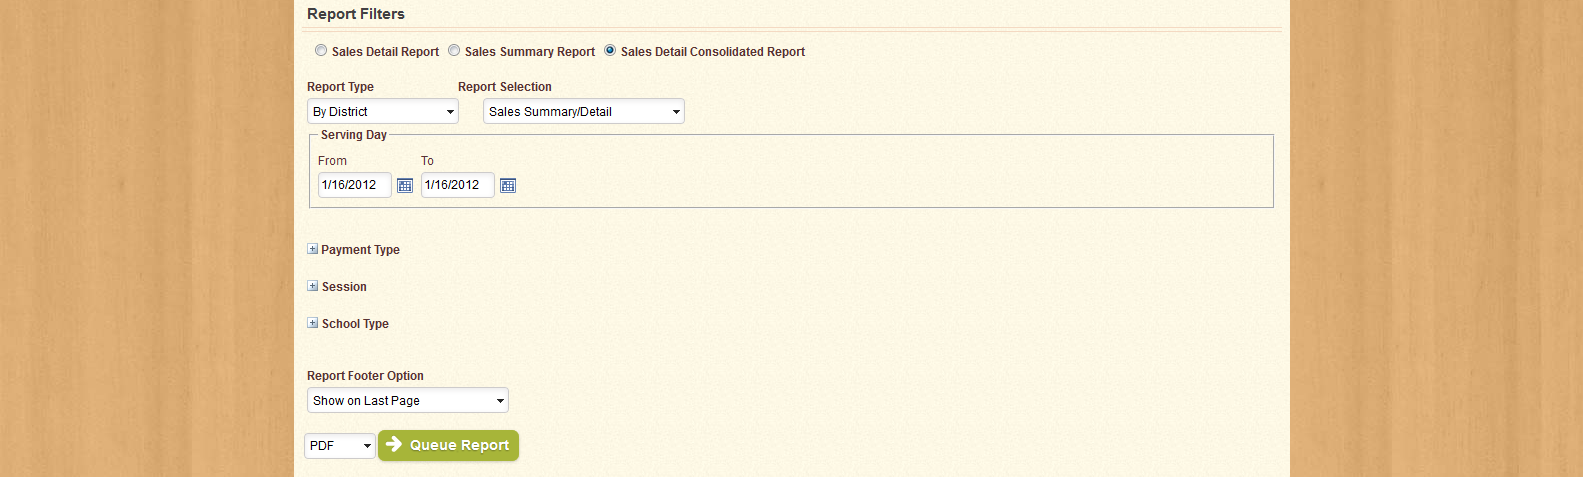
Use the Report Type drop-down menu to select whether the data will be separated by School Type, or if the data will be displayed for the entire District.
Select School Types, Payment Types, and Sessions as desired, enter a Date Range, and click one of the buttons at the bottom of the screen to run the report as either a CSV, Excel Spreadsheet, or PDF file.
| Important! | Fields marked with * are required; you will not be able to continue until all required fields have been filled. |
If you wish to select one or more specific school types for the report, click Choose. The section will expand as shown below:
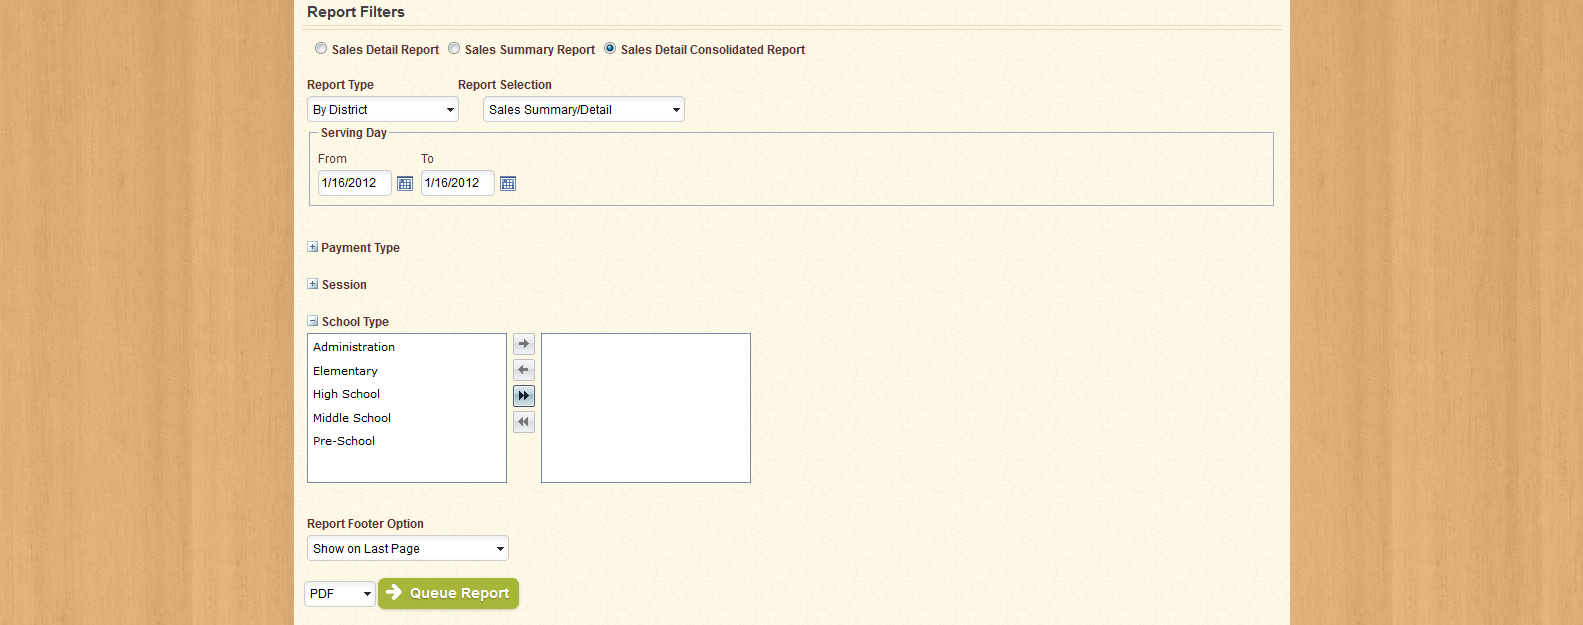
By default, all School Types will be selected. Use the arrow icons provided to move selected School Types from one field to the other, or use the double-arrow icons to move all School Types in one field to the other. You can select more than one School Type at a time by holding down the Ctrl key on your keyboard when you click each item.
When you have selected the desired School Types for the report, click Done to collapse this section. The number of School Types selected will be displayed beside the section label in parentheses.
If you wish to select one or more Payment Types to be used to generate data for the report, clicking Choose next to Payment Type expands that section, as shown below:
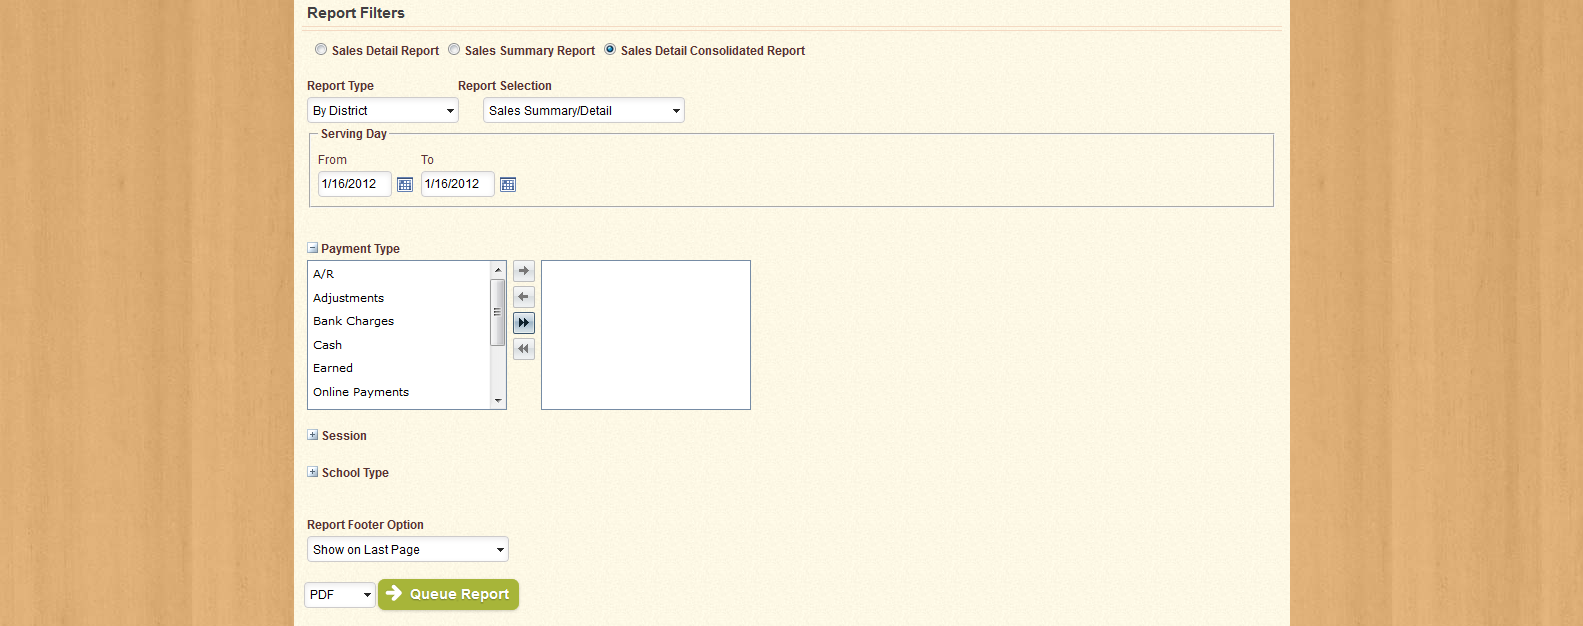
By default, all Payment Types will be in the field to the right, meaning that they will be used when generating data for the report. To remove items from the list, use the arrow icons provided to move selected items from one field to the other; or use the double-arrow icons to move all items in one field to the other. You can select more than one item at a time by holding down the Ctrl key on your keyboard when you click each item.
When you have chosen the desired Payment Types, click Done to collapse this section. The number of items selected will be displayed beside the section label in parentheses.
If you only wish to display sales information for a specific meal session, you can select those sessions by clicking the Choose button next to Session. The section will expand as shown below:
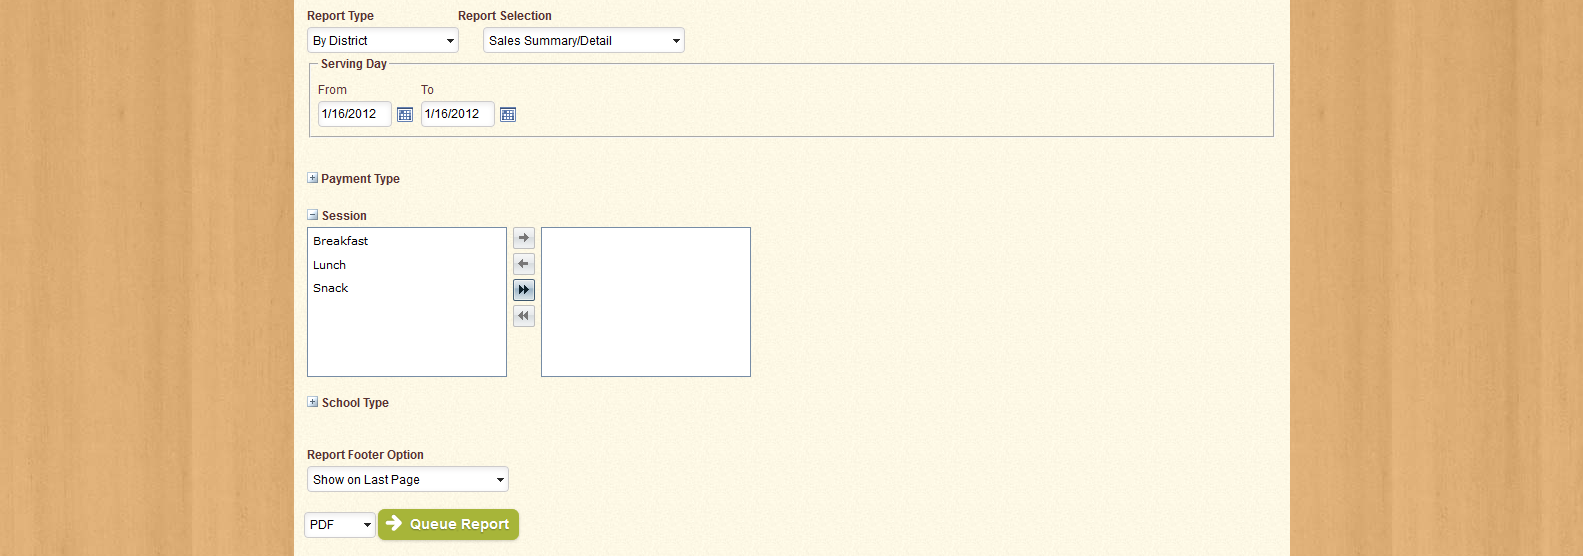
By default, all sessions will be selected for use on the report. Use the arrow icons provided to move selected sessions from one field to the other, or use the double-arrow icons to move all sessions in one field to the other. You can select more than one session at a time by holding down the Ctrl key on your keyboard when you click each item.
When you have selected the desired sessions for the report, click Done to collapse this section. The number of sessions selected will be displayed beside the section label in parentheses.
The Sales Detail Consolidated Report can be run by School Type, or Summarized by District, and displays sales information for each item within the selected date range by Session. The following table lists the columns used in the report, as well as a brief description of each column's function:
| Column | Description |
|---|---|
| Session | Displays the Session during which the selected Item was sold. |
| Item Description | Displays the name of the Sales Item that was served or sold. |
| Pay Type | Displays the Payment Type for the selected Item. |
| Patron Type | Displays the Patron Type (Student, Adult) to which the item was served. |
| Quantity | Displays the number of the selected Item sold to the selected Patron Type with the selected Payment Type. |
| Rate | Displays the Rate, in dollars, per item as sold to the selected Patron Type with the selected Payment Type. |
| Revenue | Displays the total Revenue received for the selected item sold to the selected Patron Type with the selected Payment Type. |