
The Sales Update Layout Setup screen allows you to create a layout for the Sales Update screen, which will be used depending on the Role of the user who is operating that screen. The Sales Update Layout Setup screen appears as shown below:
Use the field provided to narrow your search by Role Name and click Search to generate a list of items that match the information you provided, as shown below:
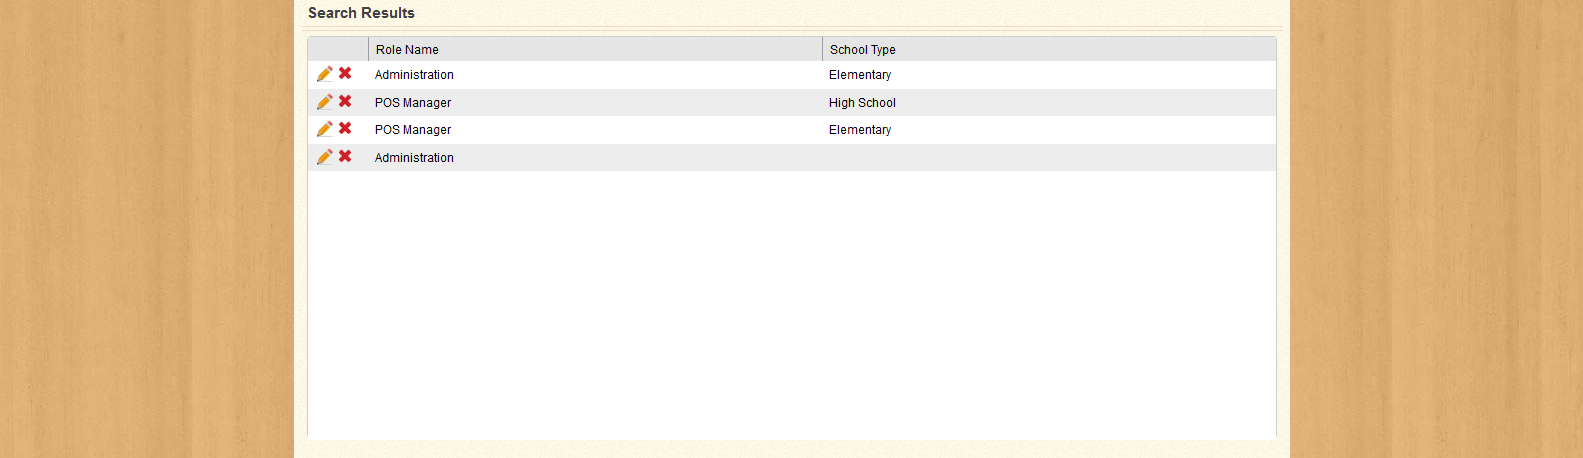
You can sort the list by Role Name or School Type by clicking the column headers. Use the  or
or  icons in the first column of each row to edit or delete the item in that row; or click Add New to create a new Sales Update Layout.
Clicking Add New opens the Add New Sales Update Layout screen, as shown below:
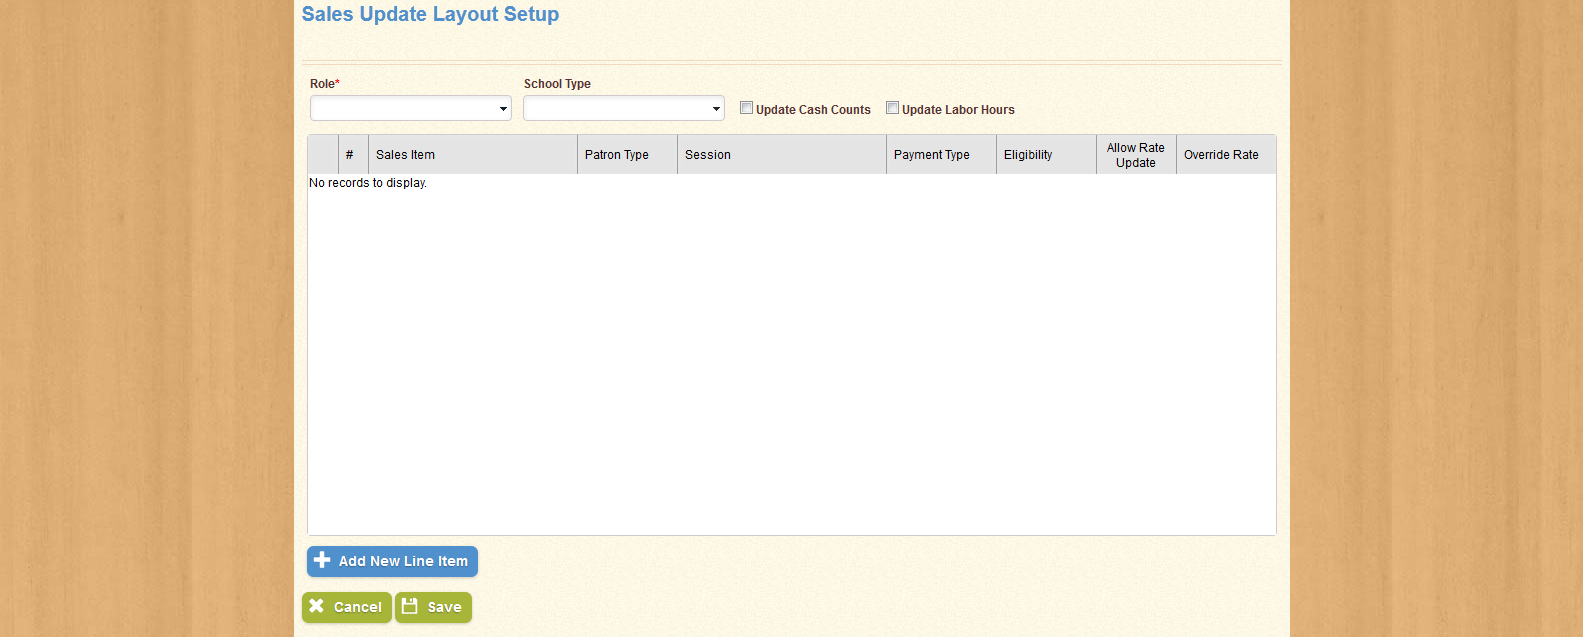
Select a Role and a School Type from the drop-down menus provided, and use the check-boxes provided to select whether the selected Sales Update Layout will also allow the user to update Cash Counts and Labor Hours.
Click Add New Line Item to add a Sales Item to the list. When you have added the desired items to the Sales Update Layout, click Save to create the Layout; click Cancel to return to the Search Form without saving.
| Important! | Fields marked with * are required; you will not be able to continue until all required fields have been filled. |
| Field Name | Description |
|---|---|
| Role | Displays the Role for which the selected Sales Update Layout will be used. |
| School Type | Displays the School Type for which the selected Sales Update Layout will be used. |
| Update Cash Counts | If this option is selected, the Update Cash Counts tab will appear on the Sales Update screen. |
| Update Labor Hours | If this option is selected, the Update Labor Hours tab will appear on the Sales Update screen. |
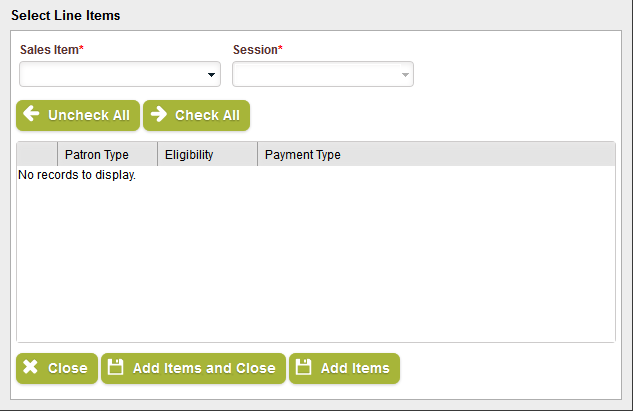
Clicking Add New Line Item opens the Select Line Item window, as shown below:
Select a Sales Item from the drop-down menu provided, and select a Session type when the Session drop-down menu becomes active. When you select a Session type, the list will become populated with Line Items, as shown below:
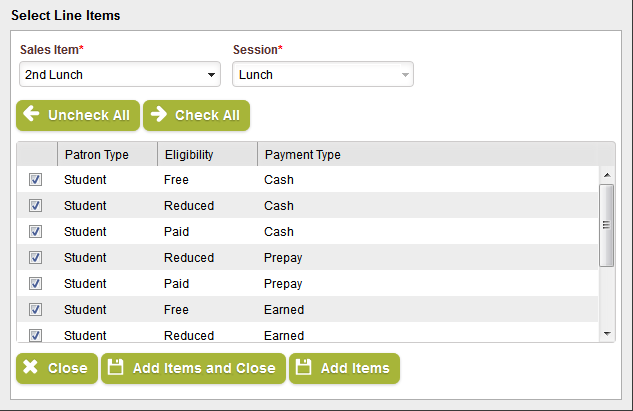
Use the Uncheck All or Check All buttons to select all or none of the Line Items in the list, or use the check-boxes in the first column of each row to select the item in that row.
When you have selected all desired Line Items, click Add Items and Close to add the selected Line Items to the list and close the window; click Add Items to add the selected Line Items to the list and keep the window open; click Close to close the window without selecting any Line Items.
| Important! | Fields marked with * are required; you will not be able to continue until all required fields have been filled. |
| Field Name | Description |
|---|---|
| Sales Item | Displays the name of the selected Line Item's Sales Item. |
| Session | Displays the Session type for the selected Line Item's Sales Item. |
| Patron Type | Displays the Patron Type for the selected Line Item. |
| Eligibility | Displays the Eligibility Type for the selected Line Item |
| Payment Type | Displays the Payment Type for the selected Line Item. |
Clicking the Edit icon in the Search Results section opens the Edit Sales Update Layout screen, as shown below:

You can sort the list by Sales Item, Patron Type, Session, Payment Type, Eligibility, whether or not the line item allows the user to change the line item's Update Rate, or the Override Rate by clicking the column headers. You can also remove a Line Item from the list by clicking the icon in the first column of each row, or click Add New Line Item to add a new Line Item to the list.
For each item, you can create an Override Rate, which changes the rate for the Line Item when the Quantity is changed in the Sales Update screen. You can also check the Allow Rate Update check-box to allow the user to change the rate for the Line Item manually.
When you have completed any desired changes, click Save to keep the changes you made; click Cancel to return to the Search Form without saving.
| Important! | Fields marked with * are required; you will not be able to continue until all required fields have been filled. |
| Field Name | Description |
|---|---|
| Sales Item | Displays the name of the selected Line Item's Sales Item. |
| Session | Displays the Session type for the selected Line Item's Sales Item. |
| Patron Type | Displays the Patron Type for the selected Line Item. |
| Eligibility | Displays the Eligibility Type for the selected Line Item |
| Payment Type | Displays the Payment Type for the selected Line Item. |
| Role | Displays the Role for which the selected Sales Update Layout will be used. |
| School Type | Displays the School Type for which the selected Sales Update Layout will be used. |
| Update Cash Counts | If this option is selected, the Update Cash Counts tab will appear on the Sales Update screen. |
| Update Labor Hours | If this option is selected, the Update Labor Hours tab will appear on the Sales Update screen. |