How-To: Entering a Patron
Before a patron can be served a meal or enrolled at a school, it must be entered into the system. The following steps describe the process for entering a patron.
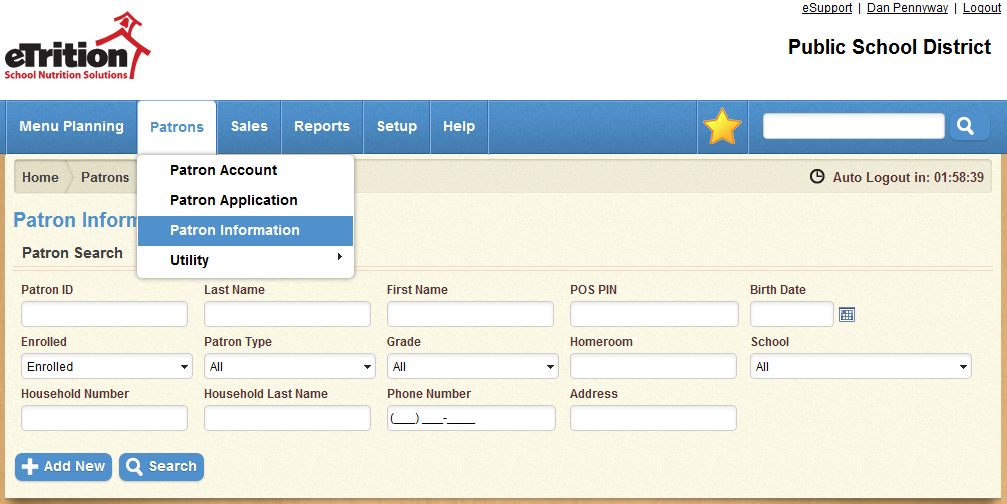
- Navigate to Patrons > Patron Information.
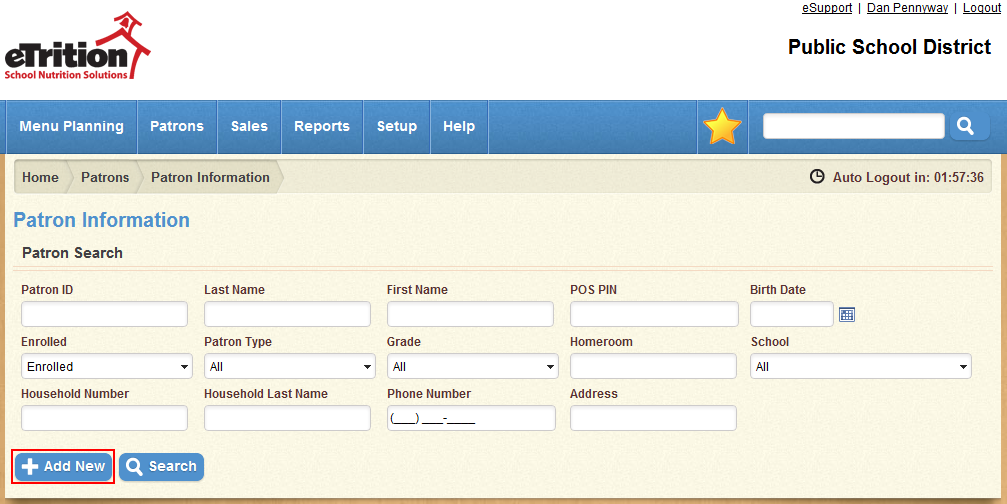
- Click “Add New”.
- In the Patron Information section, Enter the patron’s Last Name, First Name, Middle Name, Social Security Number (all 9 digits or only the last 4 digits), and Birth Date. Select an Ethnicity, Patron Type, and Gender from the drop-down lists provided, and select one or more Races and/or Allergies.
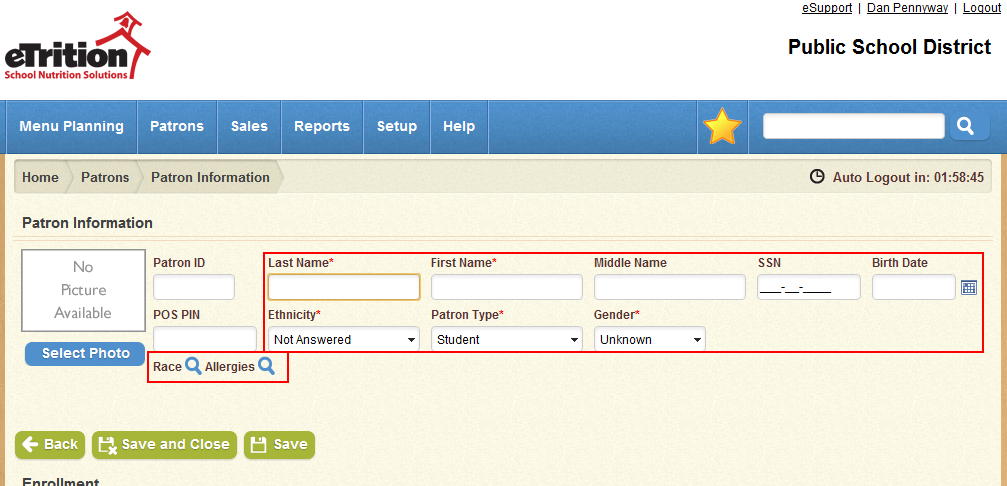
To select races or allergies, click the magnifying glass icons provided.
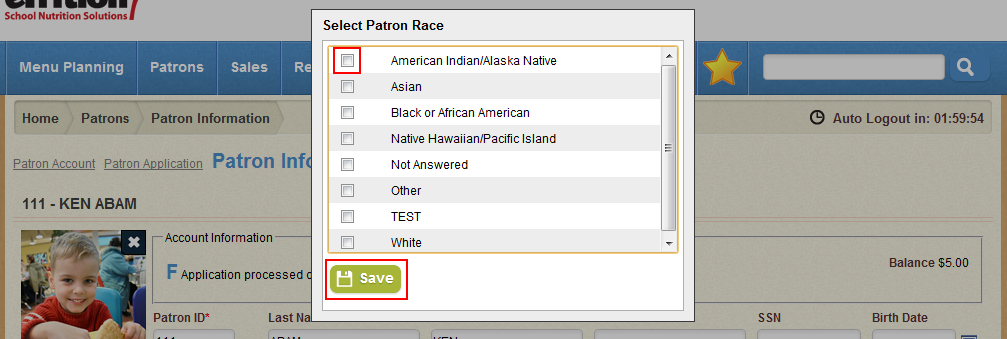
Use the check-boxes provided to select the desired races and/or allergies, and then click Save to add them to the patron's record.
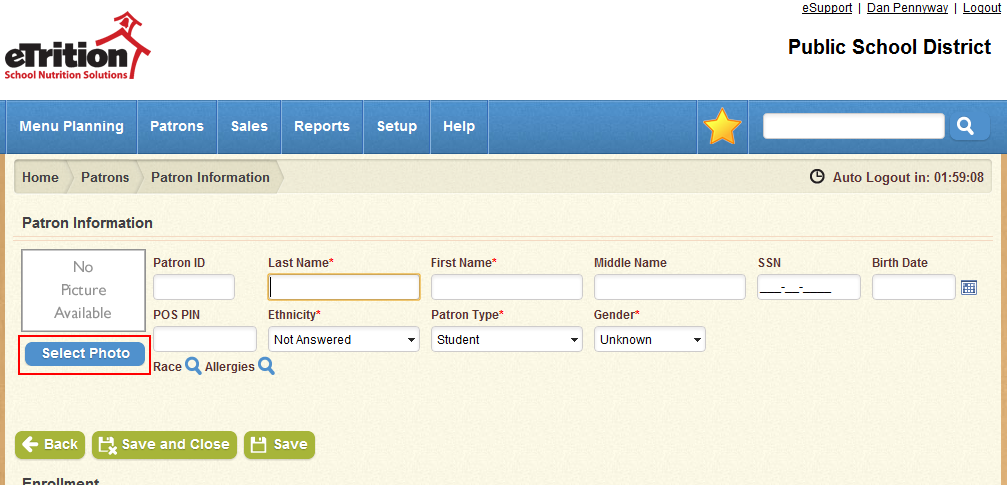
- If the patron has a photo, click Select to locate the photo on your local computer and upload it to the system.
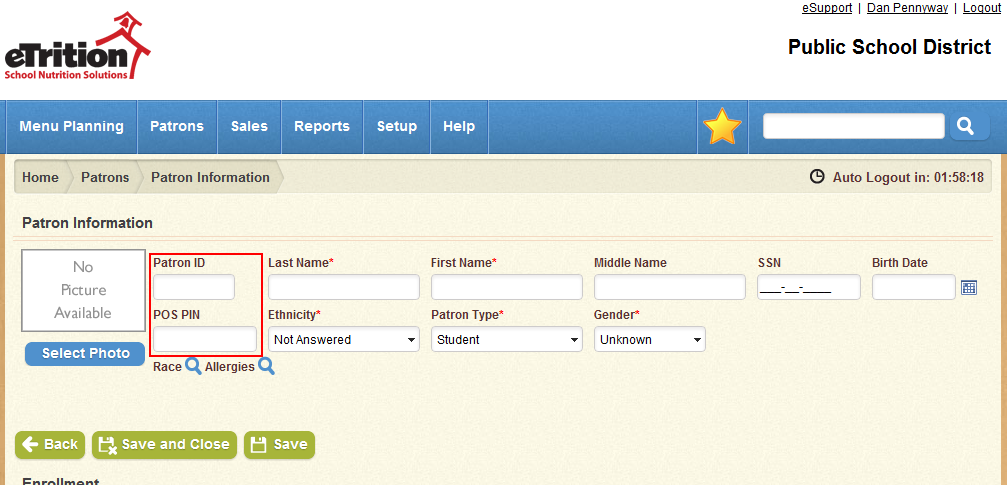
- Enter a Patron ID and POS PIN if desired; if you do not enter a Patron ID, a number will be assigned when you save the patron’s information. You will also have the opportunity to generate a new POS PIN once the patron has been saved.
- In the Enrollment section, select an Enrollment Type and School, then select a Grade, Calendar, and Homeroom. Enter the Start Date for the patron’s enrollment.

- In the Household Information section, enter a unique Household Number, as well as the Last Name, First Name, and Email address for the patron’s household. Also select the household’s Language, which will determine which language is used when printing letters for that patron. You may also click the magnifying glass to search for and select an existing household, which will add the new patron to that household’s list of patrons.

You may also select an existing household by clicking the magnifying glass icon and searching for the desired household, which will add the patron to that household when you save the patron's record.
- Enter information in the Custom Fields section as applicable. Note that if your system is not using custom fields on the Patron Information screen, this section will not be displayed.

- Click Save, or Save and Close.

If you click Save, you will be shown the patron's saved record, allowing you to make additional changes. (See "How-To: Modifying a Patron")


